Geonics EM-38 Continuous Readings With GPS and Convert to UTM
Convert to UTM Geonics’ EM-38 Continuous Readings With GPS
configured to output NMEA String $GPGGA.
Recording continuous apparent conductivity data with a Geonics EM-38 and converting the GPS to UTM is fairly straight forward.
1) Start EM38Mk2 on the datalogger (Allegro CX or TK6000 are often used). Turn on the data logger and find EM38. It is often located on the “C_Drive” or “Storage Card” Run EM38. The following menu will appear.
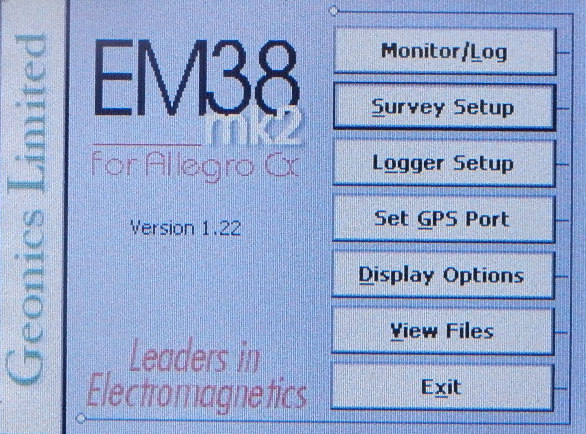
EM38MK2 Software Main Menu
2) To convert to UTM there must be GPS positioning data in the file. Check that the GPS Serial Port is enabled and configured for the GPS unit being used. Choose either COM1 or COM2. Below COM2 is selected using 9600 baud, no parity, 8 data bits, and 1 stop bit. This is a common configuration.
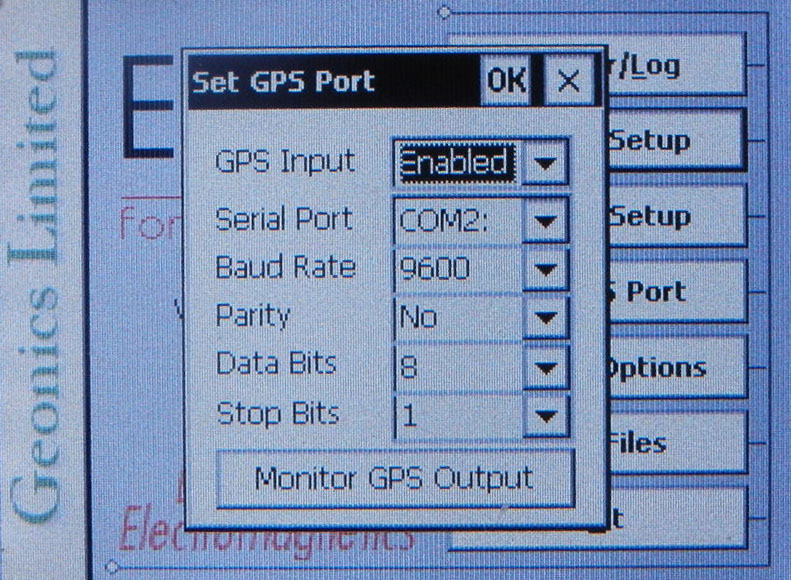
EM38MK2 GPS Setup
3) From the main menu, pick Logger Setup. The EM38 data is often recorded using COM1:. It cannot use the same port as the GPS settings above. Here, you can change if feet or meters are used, if you want to hear the beeping sound during actions, and what key will pause the data logger and allow you to change lines, stations, comments, or exit the logging operation.
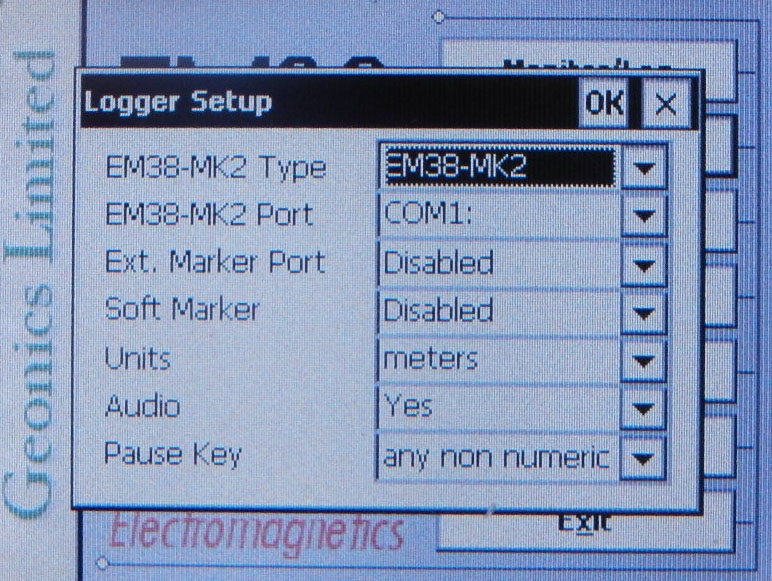
EM38MK2 Logger Setup
4) To log data go back to the main menu and click on Monitor/Log. You will need to create a file before logging. Click on Create File and either enter a new file name or use the default. The default is a series of numbers and letters that indicate when or what order the data files were created. After that, click on the GO button to start logging. The data will be recorded per the settings and should have GPS positions to convert to UTM. It is a good idea to note what directory you are storing files so that you can access these later when transferring to the PC.
EM38MK2 Monitor Log Menu
To Convert to UTM Transfer Data From Logger to PC and Convert To M38 format
5) After the data is collected, it needs to be transferred to a PC to convert to UTM and for post processing. Using Windows on the data logger copy files to a compact flash card or USB memory stick,if available. To copy a file(s), select it and hold the Stylus on it. A menu will appear with the option to copy. Copy the file. Next, enter the Storage Card Folder in the My Computer directory. Hold the Stylus in an empty area of the folder and a menu will appear again. Select Paste option to paste the file(s) to the compact flash card. Repeat the process as necessary.
Note: Multiple Files can be selected at once by dragging the stylus across the screen. This will hasten the coping and pasting process.
6) After selecting the files, turn OFF the data logger. Remove the compact flash card or USB memory stick. The card can be assessed by turning the quarter-turn fasteners counter-clockwise on the back of the data logger. Insert the card into the flash card reader provided and plug the reader in to an available USB port on the PC. Copy the files to your computer. These files are Data Logger Files with the .N38 extension. They will need to be converted to DAT38 files to be read by the DAT38 software on your computer. Install the DAT38 program on the computer if you haven’t already.
7) Open the DAT38 program and convert your files.
Follow the directions below to properly convert these files.
a) Pick the Convert Tab and select Convert (N38) Raw Files (N38) to Profile (M38) Files

Raw Data Conversion
b) Click on the Input File Button and find the .N38 file that you would like to convert.
c) After selecting the Input File, click on the Output File Button. The Output File Button asks you to rename your new file and to save it to a directory of your choice. The old N38 file will not be erased. It is still available to access after creating the new converted file. Next, click on the Convert Button. This will finish the process of converting the new file. Newly converted files will not automatically open after being converted.
Now the acquired EM-38 files are in a format for use in DAT38MK2. To access the new file click on the File Drop bar Menu from the DAT38MK2 menu and select “Open Profile file.” From here, browse for the correct directory and select the M38 file that you want to view in the DAT38MK2 program.
Convert to UTM the acquired GPS positioning for contouring
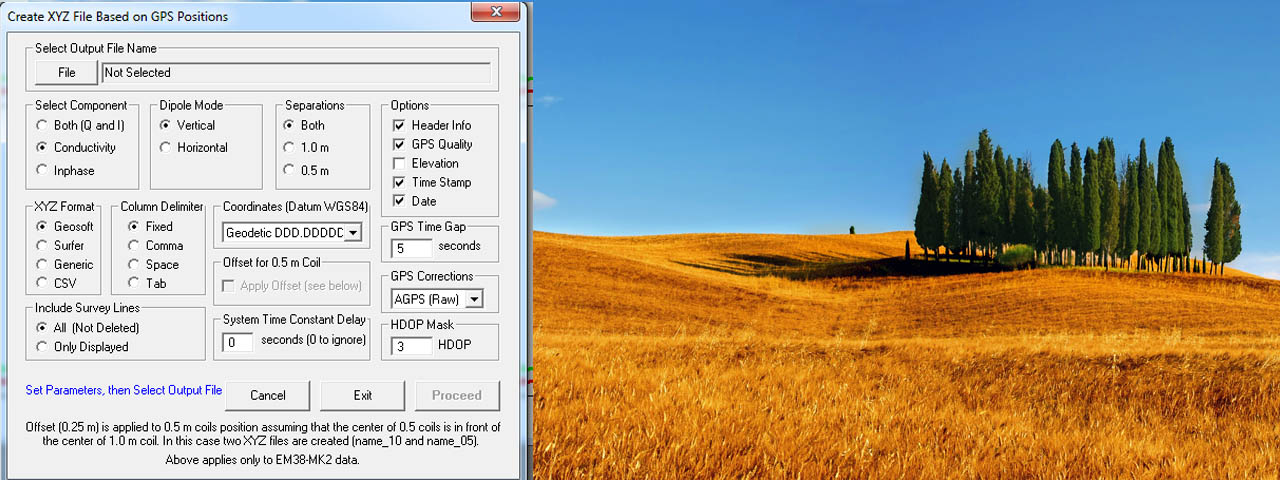
8) Once the DAT38 file is open, convert to UTM the recorded GPS positioning by changing the parameters in the “Create GPS Based XYZ File” menu. Click the tab 2D Layout and select “Create GPS Based XYZ File.”
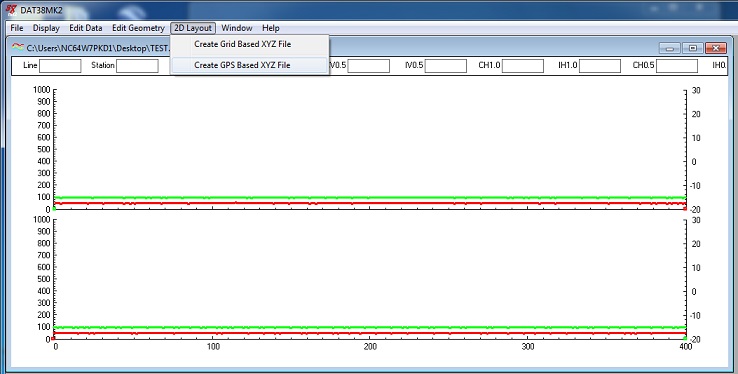
Create GPS BASED XYZ FILE
9) Change the parameters as needed. Often the settings are picked so the Component is Both or Conductivity, the XYZ Format is Surfer, the Column Delimiter is Comma, and the Coordinates are UTM US Survey feet. The last choice is required if one wants to convert to UTM.
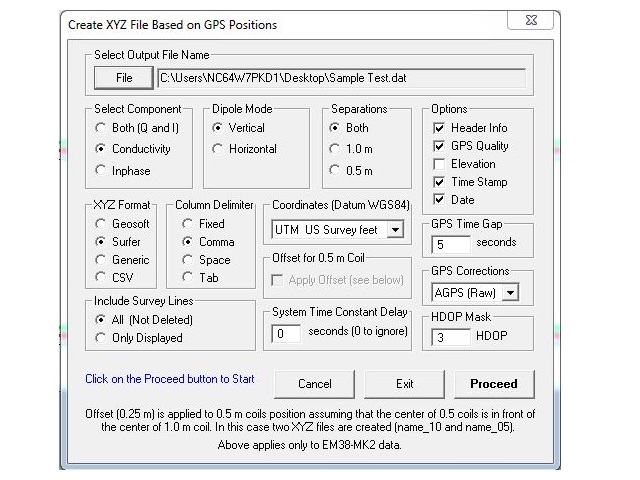
Change Parameters, File Name, and Proceed
Note that gaps in time between GPS measurements or the HDOP mask can filter out measurements. Adjust these parameters to reduce the number of dropouts. However, be aware that the GPS positions converted to UTM may be much further off in placement than one may expect. Check connections and GPS Settings.
9) At the top of the menu enter a file name and location to save the converted results.
10) Finally, click the Proceed Button. Your DAT38 and GPS files should now be completely converted. Test various settings and proceed to convert to UTM. If the data was saved as comma seperated (CSV), one may want to change the file extension to CSV so worksheets automatically recognize that the file is in a CSV format.
11) As an alternative, latitude and longitude can be converted manually using CORPSCON.