EM38 Calibration and Function Tests
Battery Test
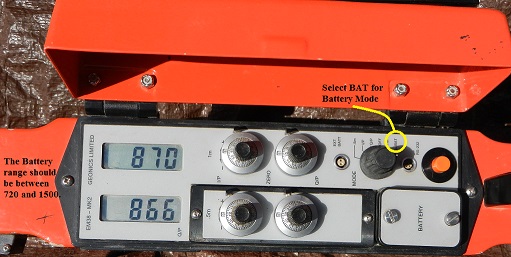
The battery test should be carried out at the beginning of each day and any time the EM38 is suspected of being low. Set the Mode to BAT.
The display meter should read between 1500 and 720 for a good battery. If the battery is outside of this range, replace the battery. Remove the battery by unscrewing the two thumb screws holding the battery in the battery compartment. A typical 9-volt alkaline battery will last about 5 hours of operation while a typical 9-volt lithium battery will last about 12 hours.
Initial Inphase Nulling
The initial inphase nulling should be done at the beginning of the day at the first station of the survey. Geonics recommends carrying out this EM38 calibration tests at least two times a day. Repeat it more often if the ground is very resistive. Remove all metal objects from your fingers, pockets, wrists, and neck. Allow the EM38 to warm up for 5 minutes.
1. Set the instrument mode to “1 m” (“.5″ for 0.5 m coil separation”).
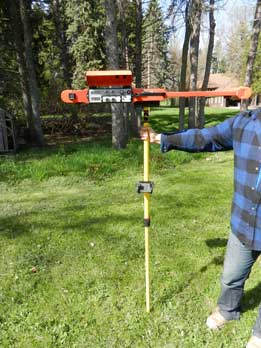
2.Lift the EM38-MK2 to a height of about 1.5 meters (5ft) above the ground with the calibration stand and put the EM38 in the horizontal dipole mode of operation.
3. Adjust the I/P meter to indicate zero using the 1 m control. The EM38-MK2 is sufficiently nulled if the instrument’s I/P meter reads zero (+/- 10 mS/m) at a height of 1.5 meters.
Instrument Zero – EM38 Calibration
This functionality check should be completed at the beginning of each day at the first station and more often when the ground has a low conductivity. Like the initial inphase nulling, remove all metal objects from your fingers, pockets, wrists, and neck and allow the EM38 to warm up for 5 minutes.
1. Set the instrument mode to “1 m” (“.5″ for 0.5 m coil separation”).
2.Lift the EM38-MK2 to a height of about 1.5 meters (5ft) above the ground with the EM38 calibration stand and put the EM38 in the horizontal dipole mode of operation.
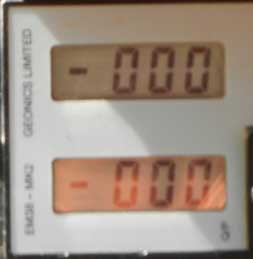
Set the Q/P and I/P readings to zero.
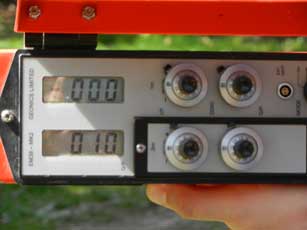
3. Adjust the Q/P meter to approximately 10mS/m using the Q/P Zero control.
Note what the mS/m meter reading. Call this variable H. (H=10)
4. Without changing the instrument’s height, rotate the EM38 to the vertical dipole mode of operation. Read the mS/m meter again. Call this variable V. This reading should be twice the amount read while the EM38 was in the horizontal dipole position. (V=2H) if zero is set correctly.
If the zero is not set correctly, take the horizontal (H) and vertical (V) readings again. Write down the value for each of these variables. Let’s call variable C the Q/P Zero control adjustment needed to set to zero.
C=V-2H
since we know H = 10, v = 13
…we can plug these numbers into our equation C = 13-(2×10), or C=13-20. C=-7 Therefore at a height of 1.5 meters in the horizontal dipole mode, we need to adjust the H variable to 3 (which is 10-7). Once we rotate it to the vertical position, V should read 6 (which is 13-7).
Example:
H= 12 mS/m
V= 35 mS/m
C=35-(2×12)= 11 mS/m
With the instrument at 1.5 m and in the horizontal dipole mode, reading 12 mS/m, adjust the Q/P by increasing the meter reading by 11 mS/m thus making the H reading 23 (which is 12+11). Now rotate the instrument to vertical mode. It should read 46(which is 35+11), which is twice 23. Zero is properly set.
Another Example:
H= 14 mS/m
V= 16 mS/m
C=16-(2×14)= -12 mS/m
With the instrument at 1.5 m and in the horizontal dipole mode, reading 14 mS/m, adjust the Q/P by decreasing the meter reading by 12 mS/m thus making the H reading 2 (which is 14+12). Now rotate the instrument to vertical mode. It should read 4(which is 16-12), which is twice 23. Zero is properly set.
Equipment Sensitivity Checks
With the instrument at 1.5 meters in the horizontal dipole position, switch to the 1 m Mode and rotate the Q/P Zero control clockwise one turn. The meter should read between 20 and 26 mS/m for 1m coil separation and 28 and 30 mS/m for .5 m coil separation. Make certain the zero control is set back to its original position.
