EM34 Survey Setup Menu
Configure the EM34 Survey Setup Menu on the TK6000.
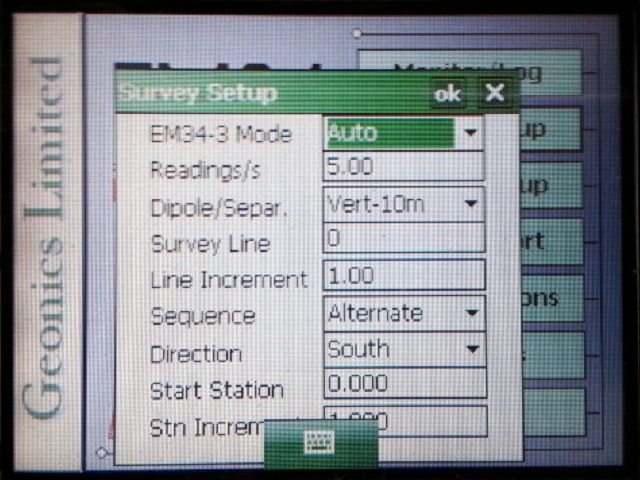
1. Using the stylus, select the EM34 Survey Setup Menu.
Picture of Main Menu
2. Select the EM34 Mode from one of the three modes:
auto, wheel, and manual. Although three options are present, only two are really viable: auto or manual. In Auto Mode, readings will be automatically recorded at a specified frequency. Only one dipole mode and one coil separation can be selected. In the Manual Mode, readings are manually triggered by the user. Make note that when Manual mode is selected, the option Reading/s changes to the option labeled Samples/Rdg.
EM34 Mode
In the Auto Mode, the user must select the number of Readings/s. The Readings/s Field is the number of readings the EM34 will take per second. Any number above zero can be entered but since the EM34 has a fixed frequency of data output at 11 readings per second, any value entered will be rounded to the nearest base frequency of the EM34. For example, an entered value of 10 will result in 11 readings. In the Manual Mode, enter any positive value into the Readings Field. This field is the number of readings that will be taken after the trigger is pressed. After the EM34 is done taking a reading it will beep, average its readings, and plot the data on the screen. The EM34 can take 10 readings per second. Therefore, if the user wants to take 100 EM34 survey readings at a station, it will take 10 seconds to collect that data.
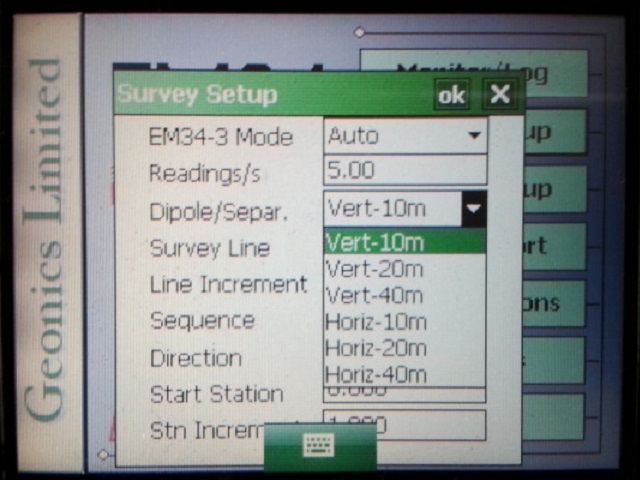
3. Select the correct Dipole Mode and Separation Value.
In Auto mode, there will be six different options: Vertical-10m, Vertical-20m, Vertical-40m, Horizontal-10m, Horizontal-20m, and Horizontal-40m.
EM34 Dipole-Separ
In the Manual Mode, this option changes to Configuration and the user is asked to select a number 1 through 6. This number pertains to the amount of different configurations that are going to be taken at each station. Make sure to keep good field notes to accurately record which data pertains to each configuration.
4.The Survey Line is the name given to each survey line.
Generally, these are coordinates of the survey. If the user names the Survey Line by a number, the EM34 program will automatically name each subsequent line a new number based on the Line Increment. The Line Increment is the distance in which EM34 Survey Lines will be from one another. So for example, if the first Survey Line is named 2.50 and the line increment is 2.50, the proceeding lines will be named 5.00, 7.50, 10.00, and so on.
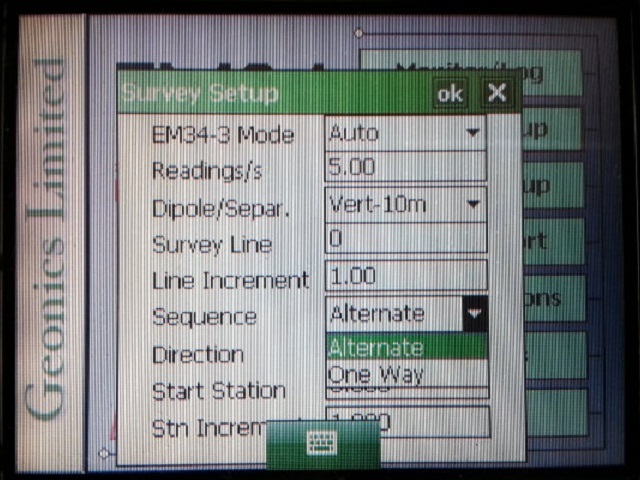
5. The Sequence Field
determines whether the user is going to conduct each survey line in the same direction (One Way) or alternate the direction of each line (Alternate).
EM34 Sequence
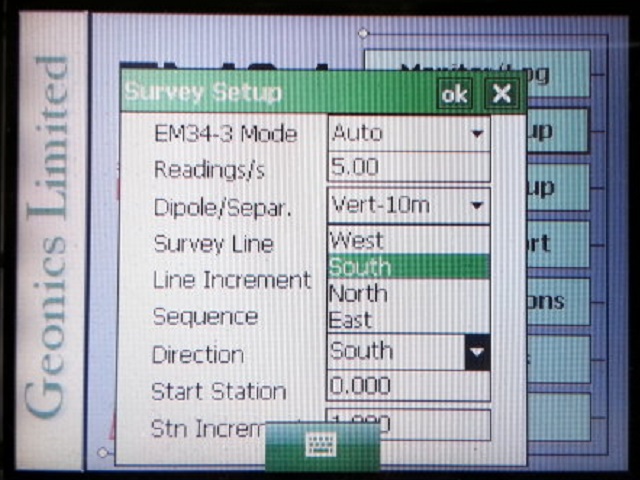
6.Select the Line Direction
(North, West, South, East) from which the first line will be surveyed. If the Sequence is One Way, this setting will stay the same for each data line. If the Sequence is Alternate, the EM34 survey will automatically switch the directions for each line with approval.
EM34 Direction
7. The Start Station Field is the starting station number for each line.
For instance, if the imperial measuring system is used and the user is starting 5 feet away from a building wall, he may want to put in a measurement of 5.00.

EM34 Start Station and Station Increment
If in the Auto Mode or Manual Mode, the user needs to select a Station Increment. The Station Increment Field is in essence the “reading” increment or at what intervals the EM34 survey will take recordings. It is also used with the Start Station Field to display information with graphics.
8. After changing the EM34 Survey Setup Menu options, it is important to save.
Press the OK Button to save. After pressing the OK Button, it is safe to push the X Button to exit. If the user exits without pushing the OK Button, the changes will not be saved.